     |
Type |
Hardware |
Purpose |
Long-range precision burst damage. |
| “ | Extreme damage Rail Cannon with a Scope. | „ |
| ~ In-game description |
The Rail Cannon , also commonly called the railgun, is a type of hardware cube in Robocraft. The Rail Cannon fires extremely fast projectile shots that deal heavy damage in a penetrative sort of fashion.
Overview
Rail Cannons are efficient in the task of eliminating threats at extreme ranges with shots that deal heavy damage and destroy vital components. The damage of rail shots is often enough to cripple even the most heavily armored robots and disable or destroy more simply constructed robots. The rail cannon has a very powerful scope.
Each rail projectile actually consists of three projectiles, 33.(3)% damage each. Say, 45K damage shot of Eraser is actually 3 * 15K. Those 3 projectiles travel as one. When they make a hit, first projectile spreads it’s damage, then ON SAME FRAME second travels further through the hole made by the first and spreads it’s damage, then third does the same (traveling even further). So it’s good for penetrating through blocks, but also bad when target is flat enough to bore through with one or two projectiles, since you lose 66% or 33% of damage in those cases.
A two second accuracy penalty is incurred immediately after moving the aim. An accuracy penalty is also incurred after firing, or rapidly adjusting aim.
Similar to other hardware cubes, rail cannons increase in size with level progression, though to a much greater degree due to their large initial size.
Pros and cons
Pros
- High damage
- Ability to break on-tier electroplates
- Long range
- Powerful scope, shoot and spot enemies before they see you
- Higher projectile velocity than Laser projectiles
Cons
- Extremely large power consumption on Erazers, though is minimal on the smaller railguns.
- Bad at close range.
- Bad against Protonium Crystals at lower overclock levels.
Shooting Sequence
When mounting multiple railguns, they will shoot in a persistent sequence. For instance, when mounting 2 railguns, the one closer to the central block shoots before the other one.
Larger number indicates further from the central block:
| Amount | Sequence |
|---|---|
| 2 | 1-2 |
| 3 | 1-3-2 |
| 4 | 3-1-2-4 |
| 5 | 5-1-3-4-2 |
| 6 | 5-3-1-6-2-4 |
Strategies
For
Basics
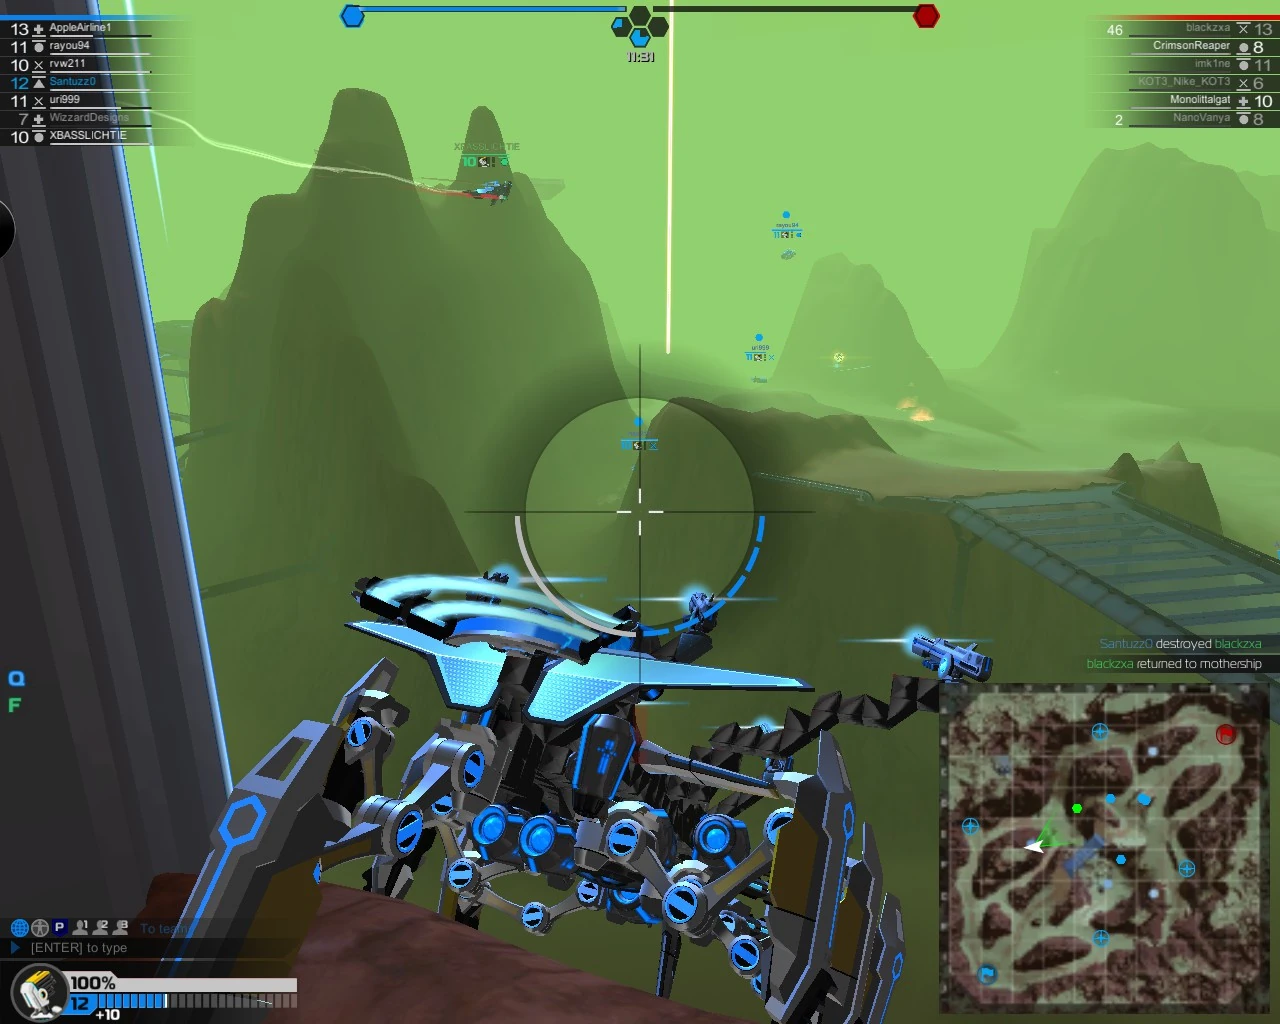
A nice place to snipe.
- As a sniper weapon, the railgun requires behavior similar to that of a sniper. Keep your distance, stay still to maximize accuracy and avoid close combat. Aim for weak points (thin sections, movement cubes, big fat guns) and avoid electroplating, unless you need to hit the weak spot behind it. Airborne targets are particularly good targets if they are far out as their movement is more predictable and your guns needs very little angular speed. Although projectile speed is high it is smart to lead targets and hold off for a second or two, so you can hit weak spots more reliable.
- Conversely, pointing your laser (even when out of range) at a small enemy unit is a great way to nudge them on another path.
- Due to the laser sight that flashes wherever you aim, it is best to wait until the enemy is distracted, looking away or has hardly any weapons to fire back before firing at them. When looking around, always keep the crosshair low, if you wait for someone to come around a corner, have the crosshair on that corner, not at the position the enemy will appear.
- At any tier it is a good idea to injure your enemy if you cannot kill them, damage their method of transportation such as rotor blades so they cannot escape.
- If you have a target that has a very tough build and their method of transportation is blocked by shields or blocks, shoot off their weapons and spot them. Any nearby friendly laserbots can pick apart a defenseless bot very quickly.
- Building Clock Cycles while the enemy rush to a tower or base allows a patient rail to become dangerous very quickly due to the Overclocking damage buff.
- Placing a tesla on a craft with railguns can be both good and bad. Having a defense against rushing enemies is fantastic but a tesla blade will often cause even more fire to fall on you out of fear. As a railgunner is already one of the most immediately targeted enemies, this can lead to many deaths that would not have happened otherwise.
- Even if you do not want to commit to camping lifestyle of snipers one extra railgun could help with reconnaissance, quick-scoping important targets (if your favored moving method allows for that) and drawing attention away from main calibers.
Versus Specific Builds and Weapons
Tanks In higher tiers, heavily built craft largely realize that they are close to impervious to a full volley of railgun shots. This will lead them to charge at the rail that fired at them, unless there is a massive obstacle between them and the rail or they are disarmed. The reason for their stamina vs rails is their sheer armor mass and the way their armor is constructed, it leads damage to a damage sink. The first shot you fire will be very telling, it will show the direction their damage sink is in by the way the armor blocks ripple and break. You must avoid firing into their damage sink as it will give you nothing other than a target on your back and a few clock cycles. Slowly learning an enemy craft's design over the course of a match will make avoiding their damage sink easier.
Flyers Flying targets are a rail's favorite but the opposite is also true. Most flying craft have large movement parts that are easily shot off. You do not need to shoot off all of their movement parts to make them fall from the sky, only on one of the sides to destabilize the craft with drag. Be aware that if you do not succeed in striking them down, you will be target number one until they respawn.
Plasma To deal with plasma bots, you just need to stay out of their sight. Keeping far away will keep their shots from landing, as well.
Railgun, if they are away from the Fusion Shield are the easiest target. Most rails have only 6 guns due to their exceptionally cumbersome size. As well, the laser shines from the gun that will shoot next. If you shoot their loaded guns, they will be useless until their next reload, 12 seconds later. Do not pursue them if they move away as they normally feign running to draw you into a trap.
Nano Craft with nano are completely incapable of reaching you without moving toward you. This is their ultimate weakness and their ultimate strength, if their teammates are observant. Any nearby teammates who notice that their medic is being fired upon will drop what they were doing earlier to fire at the one damaging their medic. Do not let them notice and do not close the gap unless it is perfectly safe.
Tesla Unless they can be taken care of at a distance or instantly, do not bother firing at them.
Laser crafts love to close the gap as soon as possible. A railgunner will always appreciate the safety of a teammate that is willing to tank hits and body-block for them.
In Low Tiers If there is no medic in a match, a few shots striking a low-tier enemy will be a death sentence for them because of their low level of armor. Crippling and one-shotting bots is the job of the rail in lower tiers.
Against
- Stay on the move and close the gap. Railgun users don't like wasting shots and will often try to get behind cover rather than engage directly. If they do, stay on them and keep firing.
- In addition to pursuing the enemy rail gunner, mark them by pressing 'Q' to help your team know where the rail gunner is. They will often run for cover behind an object in the environment to hide or find a new tactical position on the map when spotted.
- Sneaking up on a rail gunner is a great tactic due to the fact that they will try to run, but do not engage until you are close enough to make sure the rail gunner cannot escape easily, and his guns are not pointing your way when he sees you.
- Railgun players rely on their target to move in the way that they expect them to. If you turn your craft frequently then they cannot get the result that they want and will have a large cooldown after just a few shots.
- Design your craft to draw damage into its bulk.
History
Before the new spotting update/aim update, the rail cannons were extremely strong, being able to oneshot people from across the map. Luckily, in the spotting updates they added many things that made the rail cannon more fun to play against. Some of the changes to the rail cannons include: Accuracy, Aim Time, Damage output, Reload time.
Rail guns became the weakest gun type in the game after their nerfs. While their strategy has certain strengths like long-distance low risk damage, they are made relatively weak by their long reload time, large gun footprint, low DPS, and stable base requirement which make rail tanks extremely vulnerable. This discrepancy were magnified in tier 10, where larger bots are more prevalent, making damage over time more important.
After the latest buffs and changes the rail gun in now on par with the other guns but needs a lot of practice and knowledge about bots in general. A skilled sniper must know where the weak spots are, even though every bot looks different. In the hands of an unexperienced player this gun is by far the weakest.
Before the Electromania Update, Rail guns had to reload after respawning in Battle Mode, which made them very weak in defending the base after they respawned.
In the past when fully rails were depleted of shots, Rail Cannons reloaded simultaneously in 12 seconds, regardless of amount. Manually reloading (initiated by pressing R) a single cannon takes 6 seconds. No cannon may fire until reloading is complete, even if some are already loaded.
Shotgunning
Prior to the Dawn of the Megabots update of the 30th of April, 2015, it was possible to hold down the fire button and unload all loaded rail cannons within a very short time, albeit at greatly reduced accuracy. This allowed for a non-sniping approach to rail use where the user sneaks up close on targets, and fires rapidly at close range in an attempt to kill the target in a single strike. Failing that, the shooter will retreat, as even without a kill this technique will severely cripple most enemy craft. This could be surprisingly effective since the total damage 6 rails can deliver will often be sufficient to punch straight through even the strongest armor if they hit close together.
Assuming the use of 6 rail guns, the total time needed to fire all 6 shots can be calculated as follows:
| Sequence | Total time after DOTM | Total time after R&O, OC13 |
|---|---|---|
| Rail 1 fires | 0.00 seconds | 0.38 seconds |
| Rail 2 fires | 0.95 seconds | 0.76 seconds |
| Rail 3 fires | 1.90 seconds | 1.14 seconds |
| Rail 4 fires | 2.85 seconds | 1.52 seconds |
| Rail 5 fires | 3.80 seconds | 1.90 seconds |
| Rail 6 fires | 4.75 seconds | 2.28 seconds |
Quick Reload
Prior to the Maximum Loadout update of the 2nd of March, 2016, it was possible to enhance reload time by adding an extra low-tier railgun that is not fired.
If only ONE shot has been fired and the vehicle maintains at least 2 railguns, then manually reloading will always only take 8 seconds. The railguns do not have to be the same tier or level for this to occur, meaning that it was possible to use a higher-tier railgun in conjunction with a low-tier railgun and use the single-shot reload to fire the high-tier railgun at a faster rate.
Statistics
| Image | Name | Price |
Health |
CPU Load |
Mass (kg) |
Damage Per Hit | Power Consumption Per Shot | Single Gun Fire Rate Per Second | Max Fire Rate | Max Fire Rate Count |
|---|---|---|---|---|---|---|---|---|---|---|
 |
||||||||||
 |
||||||||||
 |
||||||||||
 |
| Image | Name | Firing Sound | Impact Sound |
|---|---|---|---|
|
|||
|
|||
|
|||
|
Trivia
- Railguns were added at 08/05/2014
- The general name for Rail cannon is refereed in code as KUBE_rail_cannon
- Full tier matching armor cubes were added at the release of the Rail Cannon.
- Railgun mechanics were changed in the release of Aerofoils
- It used to be possible to use the lower reload of low tier guns to quicker fire high tier guns, this was known as Proxy rail.
- The railguns used to be available in all tiers and used a different firing mechanic.
- When the railgun was first introduced, you held left mouse to charge the gun. You could fire the railgun with just one gun charged, or wait for all six. However, you only had a set amount time before it overheated.
- The old sound files are no longer used, but still exist in the game
| T1,T2 railgun firing | |
| T1,T2 rail impacting | |
| Railgun overheat warning | |
| Railgun overheated |
- Railguns lost their hitscan behavior in the Maximum Loadout Update on the 2nd March 2016.
- Rails have perfect accuracy when the robot they are mounted on is touching the ground, however they lose accuracy when the robot is flying or hovering.
| Cubes | ||
|---|---|---|
| Chassis | Cubes | Health Cubes • Light Cubes • Glass |
| Other | Rods • Struts • Helium | |
| Movement | Ground | Wheels • Hover Blades • Mech Legs • Sprinter Legs • Insect Legs • Tank Tracks • Skis |
| Air | Wings • Rudders • Rotor Blades | |
| Propulsion | Thrusters • Propellers | |
| Weapons | | Proto-Seeker • Laser Gun • Plasma Launcher • Railgun • Nano-Disruptor • Aeroflak Cannon • Lock-on Missile Launcher • Ion Distorter • Tesla Blade |
| Special | Shields | Electroplates |
| Modules | Weapon Energy • Disc Shield • Blink • Ghost • Windowmaker | |
| Cosmetic | Other | League Badge |
| Masks | Scary • Football • Mech 7 • Sabretooth • Rhino 8 • Eagle • Cockpit • OverWolf • Honeydew • Alienware | |